Balayage hair is the gorgeous trend that keeps on growing. It’s no surprise as it’s a super low maintenance, high impact effect that lasts longer than most other color treatments.
This style has become the new go-to hairstyle for many women. It’s easy to maintain, low maintenance. But can you balayage hair at home? Yes, my friends you can!
This is great news for those of us who love the look but don’t have time or money to visit our local salon every few weeks!
However, it can be tricky to know how to balayage if you haven’t had professional training – especially if you’re not sure what products are best for your specific hair type.
We’ve created this guide to help you learn everything there is to know, including which tools and products will give you the best results when trying out this trend yourself at home.
You’ll also discover some of our favourite styles from Instagram so that you can see exactly what’s possible (and maybe even copy them!). Let’s dive in…
As an Amazon Associate, I earn from qualifying purchases.
Table of Contents
- How to Balayage Hair at Home Step-by-Step.
- Best at home balayage kits at a glance.
- TOP PICK!
- L’Oréal Preference Balayage Kit
- How to prepare your hair
- How to balayage your hair at home.
- Watch and learn: How to balayage your hair at home.
- How can I care for my balayage hair?
- Frequently Asked Questions
- What is balayage hair?
- What’s the difference between balayage hair and ombre hair?
- What’s the difference between balayage hair and highlights?
- What hair colors are best for balayage?
- Will balayage hair suit me?
- What hair color suits me?
- Is balayage damaging for my hair?
- Can I do a balayage on myself?
- Do you have to bleach for a balayage?
- Parting words
How to Balayage Hair at Home Step-by-Step.
What you’ll need:
- A good paddle hair brush.
- An at-home balayage kit containing hair bleach and developer
- Mixing bowl and painting brush.
- Balayage board (flat surface that helps with hair painting).
- An old towel to protect your clothes and surfaces.
- Barrier cream to apply to your ears and hairline to stop the dye getting on your skin.
- A pin tail comb and sectioning hair clips to hold back sections of your hair to apply the lotion more precisely.
- And your hair dye kit of choice! You can read more about each of these in our Best balayage kits reviews.
Best at home balayage kits at a glance.
| Kit | Looks like | Best for | Rating | Buy now |
|---|---|---|---|---|
| Garnier Nutrisse Hair Highlights Kit Multi-Lights | Lighter shades. You’ll have to ignore the instructions which are for highlighting your hair. | |||
| L'Oréal Preference Balayage | Bronde colour. More golden hues. | |||
| L'Oréal Colorista Effect Ombre Hair | Easy use and great results.This is our pick of the bunch. | |||
| Jerome Russell Bblonde Maximum Highlighting Kit. | Cool tones. No hint of brassiness. | |||
| Schwarzkopf Live Intense Lightener | Warmer tones. If you’re after warmer colours, this is for you | |||
| Schwarzkopf Professional BlondMe Premium Brightener. | Going a few shades lighter than your base. This is powerful stuff. |
")


")
TOP PICK!
L’Oréal Preference Balayage Kit

BEST FOR: Bronde balayage color.
We LOVE the little ‘bronding brush’ in this one, it made it so easy to control how much solution is going on your hair. The color is lovely with one application which was enough to lift our previously dyed color subtly.
However, this did come out a little more golden than we would’ve liked. But after a few washes with purple toner, we’re happy with how it looks. If you’re looking for a warmer shade, this is for you.
Pros
- Easy to use with the bronding brush
- Adds shine and glossiness
- Allows for subtle color changes
- Enough product for one application
Cons
- Color can come out warmer than expected
- Purple toner needed to correct shade
How to prepare your hair
You’ve got your balayage kit and a YouTube tutorial on standby. You’ve been scrolling through Pinterest for inspiration, and you feel like you’re ready to take on at-home balayage.
But before you start coloring, you need to prepare your hair to achieve the best results possible.
If you want to get the most out of your at-home balayage experience, keep reading for some tips on how to prepare your hair for the process.
1.Start with Clean Hair
Before you begin the balayage process, start with freshly washed hair.
Use a clarifying shampoo to remove any buildup or product residues. Clean hair will give better results and more vibrant color.
Dry your hair with a towel, and don’t use any styling products such as hair spray, gel, or mousse.
Avoid applying any leave-in conditioners or serums, as they can interfere with the balayage process.
2.Protect Your Skin and Clothing
Balayage can be a messy process, so it’s essential to protect your skin, clothing, and workspace.
Put on an old shirt or cover-up with a towel to prevent staining.
Apply petroleum jelly or a barrier cream along your hairline, ears, and neck to help avoid staining your skin. If you want to be extra careful, you can also use gloves to protect your hands.
3.Prep Your Tools and Products
Make sure you have all the tools and products you will need for the process before starting.
Some of the essential items include: a balayage kit, gloves, clips, a brush, a mixing bowl, and a comb.
Follow the instructions included in your kit for the best results. You can also section your hair into small portions and secure each section with clips.
4.Be patient and confident
Finally, when it comes to balayage, patience is key.
Don’t rush the process or apply too much product. Balayage is a technique that requires precision and care.
Follow the instructions carefully, and believe in yourself. If you make a mistake, don’t worry. Hair grows back, and mistakes are a part of the learning process.
You may need to experiment a few times before you get the results you want, but you’ll get there.
How to balayage your hair at home.
Balayage can be an expensive service, but there is no reason why it has to cost so much! With a little practice and some easy steps, you can learn how to balayage your hair at home for a fraction of salon prices, without sacrificing quality.
So if you are feeling crafty and adventurous, come along with us on this journey of DIY beauty as we show you the basics of balayaging in this super easy 6-step process!
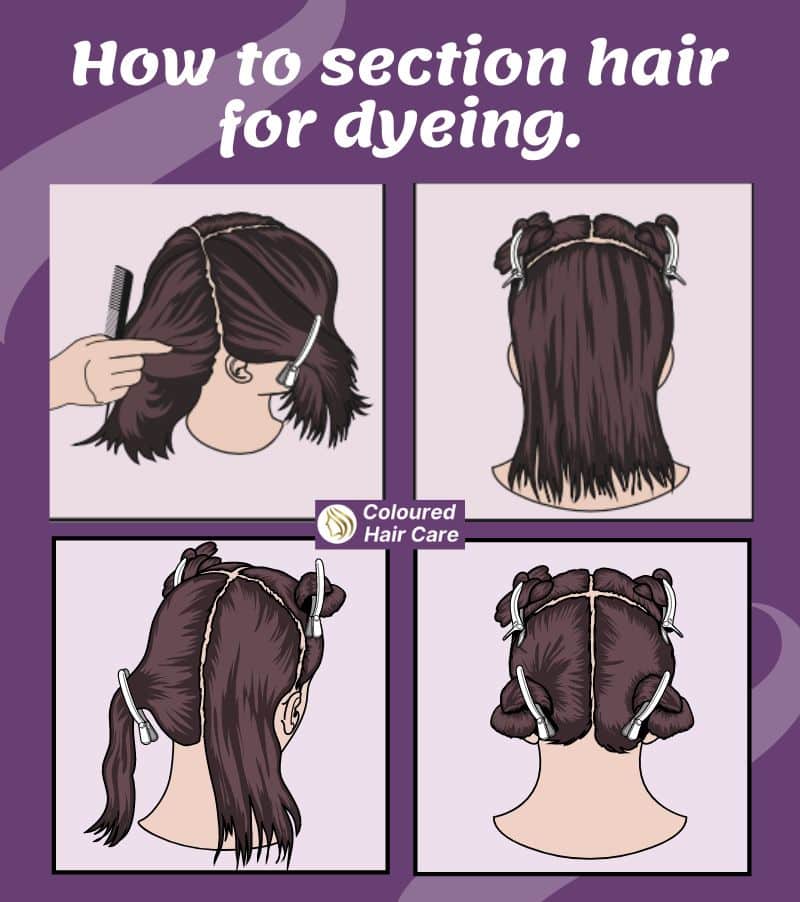
STEP 1: SECTION YOUR HAIR
Divide your hair into sections using the ‘hot-cross bun’ technique.
This means parting your hair down the middle and then width-ways to section your hair into quarters.
STEP 2: MIX YOUR BLEACH
Ready to play chemist? Don’t worry, it’s not as scary as it sounds.
Just follow the instructions on your bleach and developer packaging to get the right ratio. Once mixed, your bleach should have a yogurt-like consistency.
Note: Always perform a strand test before applying bleach all over your hair. This will help you determine how long you need to leave the bleach in to achieve your desired color.
STEP 3: APPLY THE BLEACH
Now, the fun part! Start applying your bleach mixture to the sections you’ve divided your hair into.
Be sure to start from the ends and work your way up, ensuring you’re leaving your roots for last.
Remember, the goal here is to create a natural, gradient effect – you’re not looking for a block of color.
Make sure you stagger where you start brushing downwards to avoid the dip dye/ombre effect.
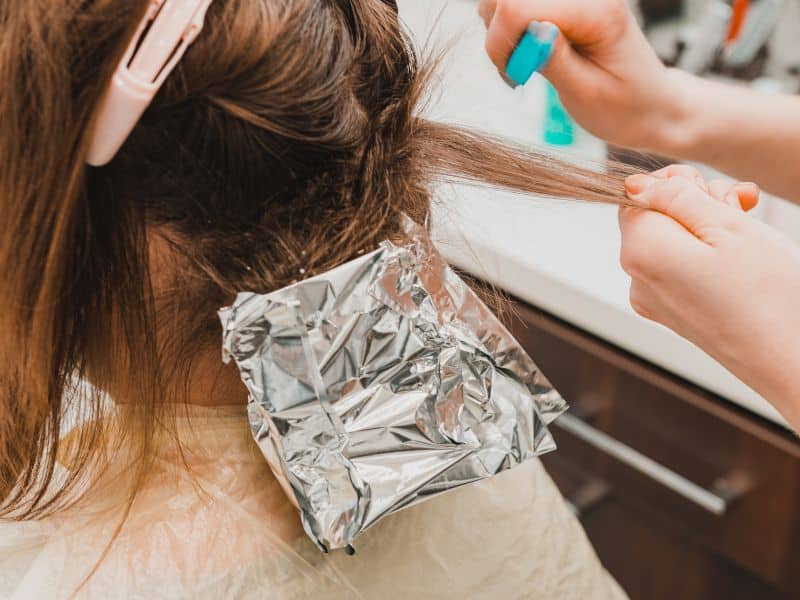
If you want lighter ends, you can use foils to help them process faster. If you feel there’s too much product anywhere, just wipe it off.
STEP 4: LEAVE TO DEVELOP
Once all of your sections have been brushed with the dye, leave your hair to develop as instructed on the box.
This should be around 30 mins. Keep an eye on it to avoid going too light. You want the effect to be as natural looking as possible.
STEP 5: RINSE AND CONDITION
Rinse your hair in lukewarm water.
Wash it out and condition your hair with a really good nourishing conditioner.
STEP 6: STYLE AND ADMIRE!
Dry your hair with a hair dryer and fall in love with your new do!
If you find the colour too bright or brassy, you can use a purple shampoo or toner to dull it down.
Watch and learn: How to balayage your hair at home.
Here’s our favorite video tutorial that guides you through how to balayage your hair at home like a pro step by step.
How can I care for my balayage hair?
Once you achieve the look you love, you’ll need to maintain it just like any other hair color.
The good news is that this is a high on gorgeous, low on maintenance look.
It wears the growing-out roots look really well – especially if you’re a brunette naturally and go for on-trend browns and deep red tones for your balayage effect.
The secret is to make sure you look after your color with products that are made specifically for colored hair.
They’ll contain ingredients that are not so harsh on your hair which will help your color last longer and restore its natural lusciousness.
If your hair is showing signs of red or orange brassiness, you can keep it cool in between colors with a good blue shampoo for brown hair.
These are toning shampoos that eliminate unwanted brassiness.
Once a week, condition your hair with a deep conditioner to keep your hair healthy and the color locked in.
Frequently Asked Questions
What is balayage hair?
Balayage hair is a popular hair coloring technique that has been around for years, but it seems to have really taken off in the past year or two.
Balayage is a technique, not a color or a style.
The word “Balayage” comes from a French word meaning “to sweep”. And indeed, that’s how the color is applied to your hair – hand painted in small triangular sweeps cascading downwards. There are darker strands left on the bottom to create an added dimension and a natural sun kissed look.
The beauty is in the blend of colors that glisten like natural highlights to make you and your hair look shinier, healthier and more lustrous.
It’s a hair trend look that looks gorgeous on short hair or long hair and suits any hair type – the multidimensional tones add depth and texture to thick or fine hair.
It looks particularly good with blonde shades like dark blonde and brown balayage or caramel balayage. What’s not to like?
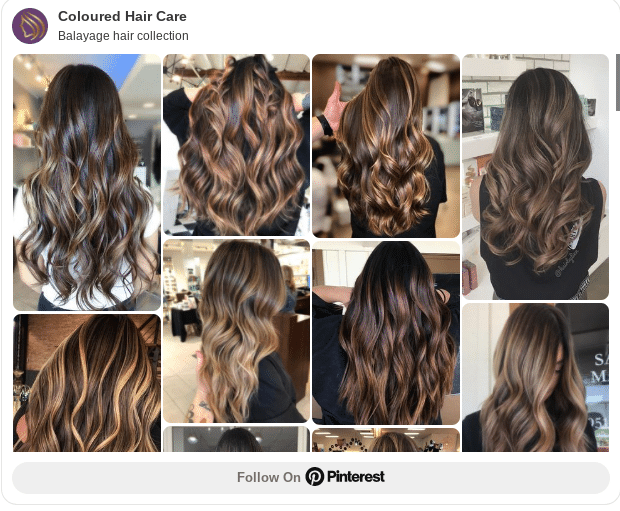
Check out the latest looks for ideas and inspiration.
What’s the difference between balayage hair and ombre hair?
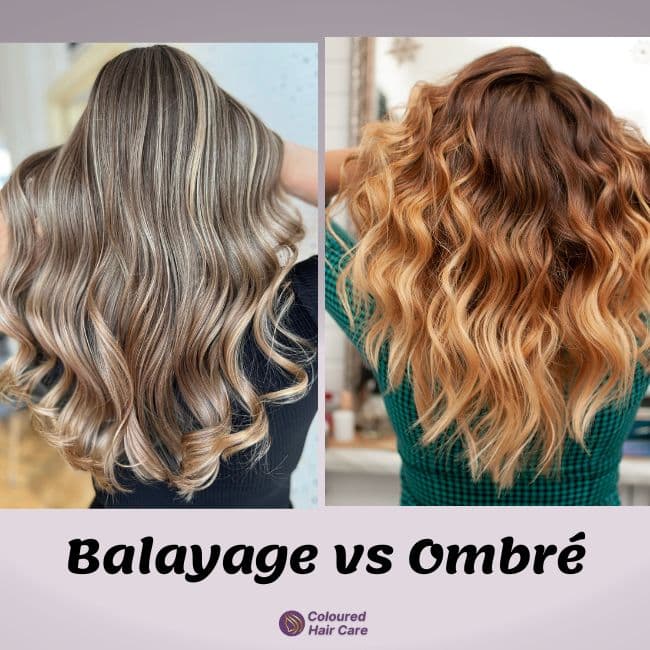
Ombre hair is a style, and also a technique, one where the lower section of hair is lightened which gives a more horizontal, band effect. It looks less natural, but just as fabulous.
Because of the banding and the fact that the ends of your hair should be getting trimmed regularly, it’s more high maintenance and you’ll need to have it done again more often.
What’s the difference between balayage hair and highlights?
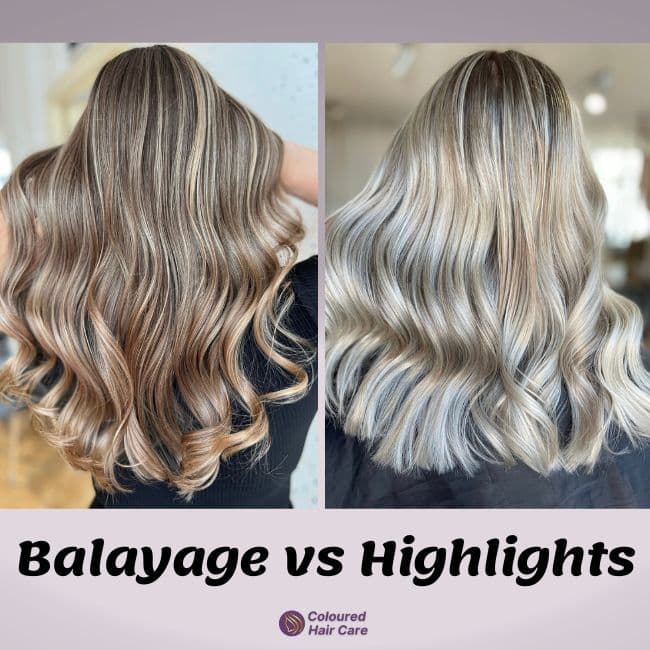
Highlights aka foils are a process, (although Balayage can also use foils too). It produces a more patterned, all-over lightness in your hair from root to tip.
It’s less natural looking and these days you’ll find many colorists will suggest transitioning towards balayage for a more up-to-date look.
Balayage is also much less high maintenance than highlights so you’ll need fewer trips to the hairdressers to top it up.
However, you do need to keep lightening already lightened hair with balayage, whereas highlights focus on new growth. So despite the extra processing with highlights, they’re pretty even stevens in terms of damaging your hair.
What hair colors are best for balayage?
Because it’s a technique, not a color, in theory you can have a blend of any complementary colors you like!
But it’s most suited and effective with colors that look great with natural highlights, especially browns, reds and blondes – so think ash browns, light natural brown, auburns and chocolates mixed with caramel and light blondes.
In Light Brown Hair Shades you need in your life right now, you’ll find all the colors that work fantastically with this style, and can learn more about if they’ll suit you.
Will balayage hair suit me?
The hair colors used are extremely versatile. So whether you have cooler or warmer tones, or a light or dark base color, there should be a blend there for you.
If you’re unsure what tones you have, you can take our quiz! Which will point you in the right direction of the hair colors that are right for you.
Just answer a few quick questions on topics like your skin tone, eye color and natural hair color and all will be revealed!
What hair color suits me?
Is balayage damaging for my hair?
The way the balayage hair style is created and the technique it uses means you’re less likely to end up with brassy, over processed tresses.
Many colorists say that the hand-painting treatment is less damaging than the usual coloring techniques that use foils and heat to set color.
But really, you’re re-lightening already lightened hair which is never good for your poor old locks.
To help strengthen and prepare your hair before, during and afterwards, use a good deep conditioner that will replenish your hair bonds and restore some moisture and elasticity to your hair.
Can I do a balayage on myself?
Yes, you sure can. But disclaimer: you may not get the same effect as a trained professional.
We always advocate talking to a colorist about your own hair as the success of at-home products depend on many factors that are specific to your and your hair.
But if you’re feeling confident, getting the look at home is absolutely achievable once you know how!
We recommend buying a kit that’s specifically for this technique, and following the instructions to the letter!
Do you have to bleach for a balayage?
Thinking of getting a balayage but not sure whether you have to bleach your hair? The answer is usually, yes.
But the good news is that it depends on your current hair color and the desired result you want to achieve. If you have lighter hair, you may not need to bleach before getting a balayage.
However, if your hair is darker or you want a more dramatic contrast, bleaching may be necessary.
Don’t worry, the process doesn’t have to be damaging to your hair with the right care and a knowledgeable stylist. And trust us, the end result will be totally worth it!
Parting words
Let’s face it, going to the salon can be expensive, time-consuming and inconvenient.
If you’re looking for a low maintenance hair color treatment that offers high impact result, balayage may just be your best bet!
What are you waiting for?!
