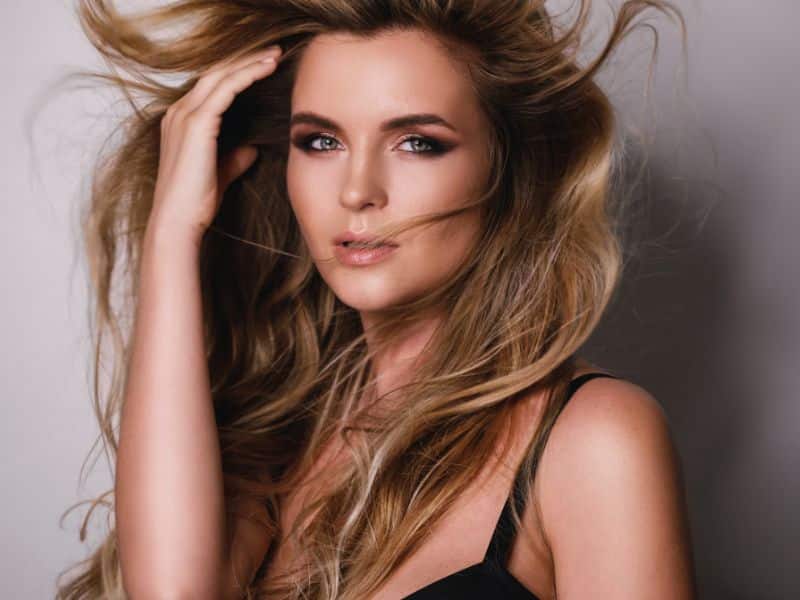
Balayage hair is the low maintenance, high on fabulous look that is blessing our eyes and fluttering our hearts from one season to the next. But is this a look you can do yourself at home?
There have been some major upgrades since our DIY-at-home hair coloring days, and this year’s at-home balayage kits are no exception.
From precision tools to special effects, we’ve rounded up the best and brightest of what 2023 has to offer in terms of giving yourself that perfect sun-kissed look in the comfort of your own bathroom.
Stand by for the best at-home balayage kits you need to achieve balayage hair at home.
As an Amazon Associate I earn on qualifying purchases.
Table of Contents
- TOP PICK!
- L’Oréal Preference Balayage Kit
- What is balayage hair?
- Can I get the balayage look at home?
- Which is the best at home balayage kit?
- Best at home balayage kits at a glance.
- #1 Garnier Nutrisse Hair Highlights Kit Multi-Lights
- #2 L’Oréal Preference Balayage Kit
- #3 L’Oréal Colorista Effect Ombre Hair
- #4 Jerome Russell Bblonde Maximum Highlighting Kit.
- #5 Schwarzkopf Live Intense Lightener
- #6 Schwarzkopf Professional BlondMe Premium Brightener.
- TOP PICK!
- L’Oréal Preference Balayage
- How to balayage your hair at home step by step.
- Watch and learn: How to balayage hair at home step-by-step.
- How to care for balayage hair.
- Parting words
TOP PICK!
L’Oréal Preference Balayage Kit

BEST FOR: Bronde balayage color.
We LOVE the little ‘bronding brush’ in this one, it made it so easy to control how much solution is going on your hair. The color is lovely with one application which was enough to lift our previously dyed color subtly.
However, this did come out a little more golden than we would’ve liked. But after a few washes with purple toner, we’re happy with how it looks. If you’re looking for a warmer shade, this is for you.
Pros
- Easy to use with the bronding brush
- Adds shine and glossiness
- Allows for subtle color changes
- Enough product for one application
Cons
- Color can come out warmer than expected
- Purple toner needed to correct shade
What is balayage hair?
Balayage hair is a technique, not a color or style. So achieving the look comes down to how well you expertly apply the color to your hair.
The beauty of balayage is in its naturally sunny vibes and the rich tones and hues that are blended together to create the stunning balayage effect.
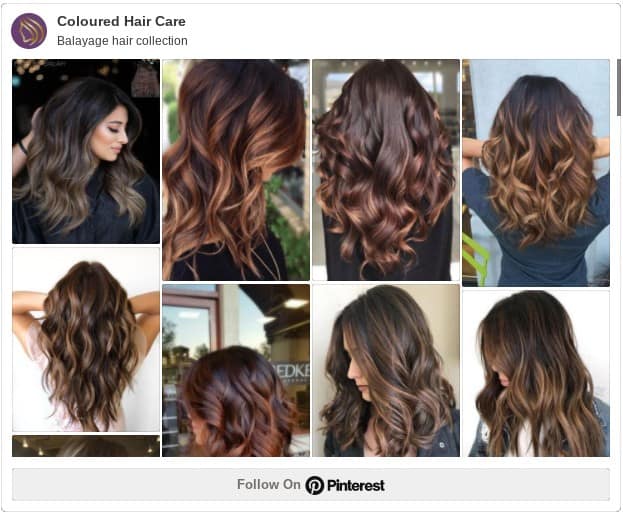
Check out the latest balayage looks for ideas and inspiration.
Can I get the balayage look at home?
The good news is yes, you can, using an at home balayage kit. But disclaimer: you won’t get the same effect as you would from a trained professional.
We always advocate talking to a colorist about your own hair as the success of home balayage kits depend on many factors that are specific to your and your hair.
But if you’re feeling confident, getting balayage hair at home is absolutely achievable!
Which is the best at home balayage kit?
There are a few at home balayage kits that you can buy with instructions on how to get the look. Essentially, these are all lightening kits with special balayage instructions.
This means, you can also use any ombre or blonde highlighting kit to achieve the balayage effect as it’s all in THE TECHNIQUE.
“The biggest difference between salon and at-home color is that in a salon, we’ll mix two or more different shades to create a totally customised hue.”
~Elena Rossi, Professional Colorist.
But what happens if you just have what’s in the box? In terms of shade, the rule from our expert colorists is always to go for a color only one shade lighter than your natural hair to avoid any orange hair mistakes.
Brown hair balayage is an easy color blend that looks gorgeous.
Without further ado, here are our top recommends for achieving that gorgeous on-trend balayage look at home!
Don’t forget to do a strand test before you start!
Best at home balayage kits at a glance.
| Kit | Looks like | Best for | Rating | Buy now |
|---|---|---|---|---|
| Garnier Nutrisse Hair Highlights Kit Multi-Lights |
| Lighter shades. You’ll have to ignore the instructions which are for highlighting your hair. | ||
| L'Oréal Preference Balayage |
| Bronde colour. More golden hues. | ||
| L'Oréal Colorista Effect Ombre Hair |
| Easy use and great results.This is our pick of the bunch. | ||
| Jerome Russell Bblonde Maximum Highlighting Kit. |
| Cool tones. No hint of brassiness. | ||
| Schwarzkopf Live Intense Lightener |
| Warmer tones. If you’re after warmer colours, this is for you | ||
| Schwarzkopf Professional BlondMe Premium Brightener. |
| Going a few shades lighter than your base. This is powerful stuff. |
")


")
#1 Garnier Nutrisse Hair Highlights Kit Multi-Lights
")
Features & ingredients:
- The color creme nourishes your hair with grape seed and avocado oil.
- It’s enriched with fruit oil concentrate, penetrates deep into hair fibres.
- Conditions your hair so it takes color better and holds it longer.
- One of two highlighting kits that can help you create subtle contrast and highlights in your hair.
Reviewers say:
“I highly recommend this. I’ve used it a few times to give champagne blonde color to my dark brown hair – i Love it!”
“This was my first time coloring my hair so I got my sister to help. The instructions were easy enough to follow. After she was done putting subtle streaks in my hair, we waited for 15 minutes, and viola! Natural looking blonde highlights that blend in with my natural hair!”
“I’ve used this for many years as a balayage highlighter. If you have medium to thick hair, it might be wise to purchase two boxes of highlighter instead of one. Highlights are always done best with two sets of hands.”
Our experience:
This made our hair feel super soft. Which is what the Nutrisse brand is all about. It didn’t make our hair feel straw like at all and the conditioner that comes with it smells divine.
The color was subtle on our light brown hair. This is the lighter kit of the two Nutrisse lighteners available and the difference was very noticeable.
You’ll have to ignore the instructions which are for putting highlights in your hair from the roots. With balayage you’re only touching the mid-to-end lengths of your hair.
The only downside was the smell which was quite overpowering.
BEST FOR: Lighter shades.
#2 L’Oréal Preference Balayage Kit
Features & ingredients:
- Glam Bronde kit combines lightening creme technology with a nourishing conditioner giving optimal lightening and luminous hair.
- Made for dark blonde to light blonde hair.
- Naturally blended, ultra glamorous.
- Brush-on balayage.
Reviewers say:
“Used this and it’s a great product, gave subtle lights and easy to use. My hair didn’t feel dry the conditioner supplied worked a treat and my hair was super soft and shiny.”
“I love this in-between natural blonde/brown look. It’s not too dissimilar to my natural color, but it adds shine.”
“Really glossy and sophisticated – you’d never tell I did it at home!”
Our experience:
As the name suggests – Bronde is a color in between a Brunette and a Blonde so we gave this one a go with mid-brown to dark hair.
We LOVE the little ‘bronding brush’ in this one, it made it so easy to control how much solution is going on your hair. The color is lovely with one application which was enough to lift our previously dyed color subtly.
However, this did come out a little more golden than we would’ve liked. But after a few washes with purple toner, we’re happy with how it looks. If you’re looking for a warmer shade, this is for you.
BEST FOR: Bronde balayage color.
#3 L’Oréal Colorista Effect Ombre Hair

Features & ingredients:
- DIY lightening kit to create hair highlights effects in a stroke.
- Create the perfect base to follow with Colorista washout color.
- The gentle formula lightens all hair colors.
- The after-care conditioning formula nourishes hair.
Reviewers say:
“Overall I loved the effect of the ombre kit. A great toned lightened color that blended naturally into my hair. This product can create beautiful results.”
“I used this on my medium brown hair that I’ve never dyed before in my life! I was nervous but the outcome is amazing! I left it on for longer than the box says as my hair is so dark. But after 45 mins, it definitely worked great for me.”
“This kit worked better than I expected! The brush makes it easy to use but it was a little tricky doing the back of my head myself! I have medium to light brown hair and the bits I ombre’d came out a lovely golden color.”
Our experience:
Ok, so this is an ombre kit from L’Oreal Colorista. But this has everything you need for balayage, just be sure to ignore the ombre instructions and follow our balayage guide here to get the right technique.
The instructions are easy to follow and the formula is thick so it applied well to our hair. We painted it on freestyle working from the mid section of our mid brown hair to the ends.
The results make a great at home kit to use to balayage your hair. Our mid-brown hair turned into a mix of caramel highlights that looked natural and not streaky.
We applied tin foil on some of the ends which did have a lighter effect, but in hindsight, this wasn’t needed. The color was lush. You’ll need two boxes if your hair is long.
BEST FOR: Easy use and great results.
#4 Jerome Russell Bblonde Maximum Highlighting Kit.

Features & ingredients:
- Lifts sections of dark blonde to dark brown hair to achieve natural looking highlights.
- Salon quality results for maximum Blonding and natural shine.
- Lifts up to 8 to 9 shades.
- Permanent lightening controlled highlights
Reviewers say:
“All I can say is I love the product so much for what it has done to my hair! I was so so happy with it as I thought my hair would come out really orange as it usually tends to due to my natural warm brown hair. However, it came out absolutely gorgeous!!”
“I read the reviews on this product and decided to take the plunge!! Well what can I say, in just 50 mins I had amazingly blonde hair with no hint of orange or brass!!”
“I have been using this kit for years. I have naturally dark blonde hair with A LOT of red undertones. I have tried home highlight kits in the past that either don’t make any difference or my hair goes orange or brassy. I’ve also had highlights done at the hairdressers and no one gets the color like this kit.”
Our experience:
This is a proper highlighting kit with a highlighting cap and everything (which you’ll need to ignore). Just follow the instructions for the formulation, how to mix it all together, and the timings.
This is a powerful one for the already blondes. We applied on dark blonde hair as per the balayage for hair technique above and after drying our hair, our ends appeared a beautiful icy, bright white blonde.
This is definitely the best at home balayage kit for cooler tones as there’s no hint of brassiness but you’ll need to be sure cooler tones suit you. You can check on our quiz, Which hair colors suit me? Take the quiz!.
BEST FOR: Cool tones.
#5 Schwarzkopf Live Intense Lightener

Features & ingredients:
- An intense lightener and permanent color with an oil booster that lightens your hair up to 9 shades.
- Guarantees less brassiness by neutralising unwanted yellow undertones.
- Leaves hair touchably soft with a glossy shine.
- With a brightening Oil Booster for up to 9 levels of lift.
Reviewers say:
“Bought this as I wanted to lighten my hair- it definitely worked but the results were not the color on the box! I have dark brown hair and have colored it in the past- be prepared to color twice if you want the color you can see on the product box.”
“Better than others at lifting my dyed brown color. I’ve tried a lot of the other brands and this is the one I would most recommend.”
“First time I’ve used this and can honestly say it does the job. My hair was already quite blonde and I just wanted to add a few balayage highlights. This worked great. I was worried about my hair being frizzy and dry but it wasn’t. Well happy with this.”
Our experience:
We tried this in Blonde Highlights | How to nail the lighter look at home, and knew it would be fabulous for achieving a caramel blonde effect in our Ash brown hair.
It does lighten quite yellow, but after a couple of days, the color becomes a creamy, caramel blonde that blends perfectly with mid to light browns.
If you’re after warmer colors, this is for you but keep it to one shade above your natural color or risk being orange.
BEST FOR: Warmer tones.
#6 Schwarzkopf Professional BlondMe Premium Brightener.
")
Features & ingredients:
- The BLONDME Bond Enforcing Premium Lightener 9+ offers an unbeatable 9 levels of lift, making it the most powerful lightener on the market.
- Creates new bonds within the hair fibre to leave hair feeling stronger and looking healthier.
- Revives and protects the hair for healthy-looking, bright blonde results.
Reviewers say:
“I got the BlondMe range!! Just about to use it. Strand test came out totally luscious! Lovely. Really does lift stronger than any other product I’ve used. And the texture of the strand test after was beautiful!”
“I’m obsessed with this bleach!!! It works wonders, doesn’t hurt my head and lifts so well and beautifully. This product has done wonders for me.”
“This is definitely a keeper! I recently switched over to this and let me tell you- the integrity of my hair is amazing!”
Our experience.
This is the hard stuff. This is the stuff the professionals use. If you want your balayage to be a few shades lighter than your base hair color, use this. With caution – it can lift even black hair to bright white blonde and you’ll need to pay special attention to the mixing instructions.
It has bond builders to help protect processed hair from getting damaged. You need to mix it with the BlondMe Premium Developer and we also add in Olaplex for extra strengthening.
We used this on ash blonde hair to achieve ice blonde balayage lights and the results were stunning, fast.
This is powerful stuff so only use if you consider yourself an experienced hair dyeing pro and/or other at home balayage kits haven’t achieved the lightness you were looking for.
BEST FOR: Going a few shades lighter than your base.
TOP PICK!
L’Oréal Preference Balayage
BEST FOR: Bronde balayage color.
We LOVE the little ‘bronding brush’ in this one, it made it so easy to control how much solution is going on your hair. The color is lovely with one application which was enough to lift our previously dyed color subtly.
However, this did come out a little more golden than we would’ve liked. But after a few washes with purple toner, we’re happy with how it looks. If you’re looking for a warmer shade, this is for you.
How to balayage your hair at home step by step.
If you’re ready to take the plunge, but don’t want to spend the money on a professional salon treatment, you’re in luck!
You can do your own balayage from the comfort of your own home. Here’s a step-by-step guide to getting that perfect balayaged look without leaving your house.
For an more in-depth walkthrough, check out our Balayage guide for beginners.
Step One: Pick Your Color
Choose a balayage kit from the ones we recommend above. Pick one that’s a shade or two above your current base hair color level for the best results.
This will make sure it that it complements your natural hair color but still provides enough contrast for an interesting, modern look.
Once you have chosen your color, make sure to get all of the supplies you need before beginning. This includes a tint brush, bleach powder, developer solution, and toner!
Step Two: Prepare Your Hair
Before beginning the process of balayaging your hair, it is important to make sure that it is properly prepped and ready for dyeing.
Start by shampooing and conditioning your hair with clarifying shampoo specifically designed for bleaching or coloring hair.
Comb through your hair with a wide-toothed comnb to make sure that there are no knots or tangles in your hair before continuing.
Step Three: Apply the color
Now it’s time to start balayaging!
Start by separating small sections of hair that you want to highlights using clips or clamps as needed.
Think about where the sun lightens your hair naturally and apply the formula there. This will give you a natural, sun-kissed effect.
Starting at one end of each section, use your tint brush to apply bleach mixture evenly along the entire length of each section of hair.
Make sure that all sections are covered in an even layer of bleach mixture before moving on to the next step.
Step Four: Processing Time
Once all sections have been thoroughly saturated with bleach mixture, let them sit for 20-30 minutes depending on how light you want your hair to be when finished.
Keep an eye on the process so that you don’t overprocess and cause damage or breakage to your hair strands!
When finished processing, rinse out all bleach with cool water until it runs clear and then move onto step five.
Step Five: Toner (optional)
If your hair is looking a bit orangey, you can tone down any brassy tones with a purple-based toner which will help neutralize any unwanted yellow tones in your glossy locks.
Follow the instructions on toner packaging for best results!
After toner has been applied, rinse out completely with cool water and proceed with styling as usual (air drying or blow drying).
With this simple guide in hand, achieving beautiful balayage highlights at home is easier than ever!
Just remember – preparation is key when doing any kind of chemical treatments on your own at home so make sure everything is set before starting the process!
Have fun experimenting with different colors and techniques until you find something you love – happy styling!
Watch and learn: How to balayage hair at home step-by-step.
Here’s an awesome video tutorial from expert colorist Brad Mondo who guides you through how to balayage your own hair at home.
How to care for balayage hair.
With great hair comes great responsibility!
You need to take proper care for your balayage hair to maintain its beauty and shine. Here’s your easy guide to caring for your balayage hair.
#1 Use the Right Hair Products
Using the right hair products will make a significant difference to the life of your balayage.
Invest in a sulfate-free shampoo and conditioner that is explicitly made for color-treated hair.
This will protect the pigments of your balayage hair from fading.
Pro-Tip- Use hair oil to keep your hair nice and moisturized.
#2 Wash Your Hair Less
The idea of washing your hair every day to keep it clean is a myth!
By overwashing your hair, you are destroying your hair’s natural oils, leaving it dry and brittle. It’s best to wash your hair every other day to prevent the oils from building up, which can dull your balayage hair.
Pro-Tip- Using dry shampoo can help refresh your hair in between washes.
#3 Protect Your Hair From Sunlight
Ultraviolet rays from the sun can make your balayage hair look faded or dull over time.
Whenever you are exposed to sunlight for an extended period, use a scarf or hat to protect your hair from the sun’s rays.
Pro-Tip- After spending an extended time in the sun, use a leave-in conditioner to replenish your hair’s lost moisture.
#4 Regular Trims Are Essential
Regular hair trimming, every six to eight weeks, is a must to keep your balayage hair looking healthy and gorgeous.
Your hair will be prone to split ends if you postpone regular trimming, and this will make your hair lose its natural shine.
Pro-Tip- Trim your hair if you see uneven growth or split ends to keep your hair looking healthy.
#5 Avoid Using Heat Styling Tools
Heat styling tools are notorious for damaging your hair.
Too much heat applied to your balayage hair will cause it to dry out, fade, and look frizzy.
Avoid using heat styling tools as much as you can. However, if you must use one, use a heat protectant to minimize heat damage and maintain the quality and texture of your balayage hair.
Pro-Tip- Use a cool setting to style your hair instead of a hot setting to avoid damaging your hair.
Parting words
From the trendy to the classic, DIY balayage looks like a well-kept celebrity secret no more.
The advances of modern at-home balayage kits can help you achieve salon level color every time, no matter your skill level.
Whether you love the sun-kissed look or are into texture and dimension, these kits offer up foolproof results for your perfect home hair transformation.
So go ahead and give yourself the makeover you deserve with one of these gorgeous at-home balayage kits. Good luck!