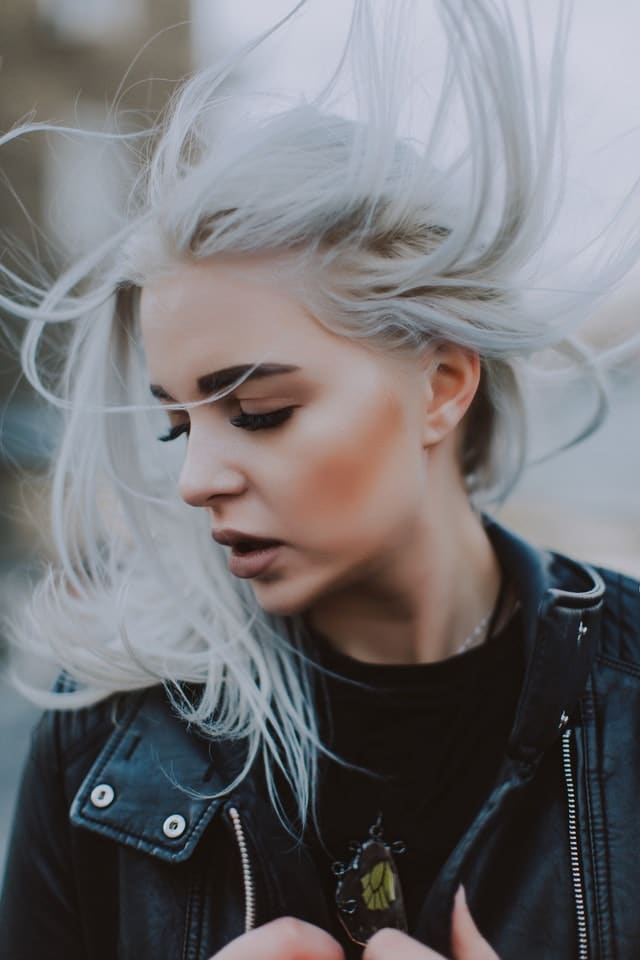
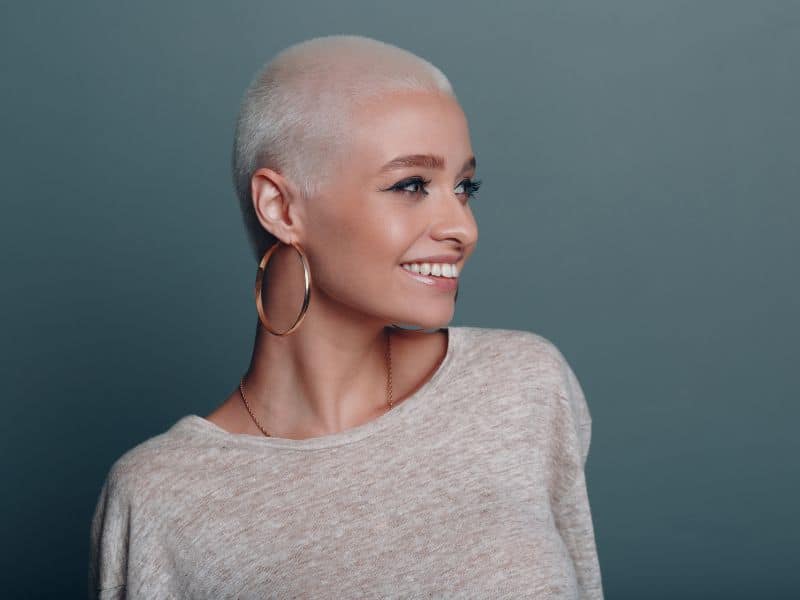
Silver hair has got us obsessed, and it’s making hot grannies out of all of us. If you’re feeling adventurous, there’s never been a better time to go gray.
This shimmering, metallic shade is not just a stylish way to embrace natural aging—it’s a fashion statement that’s as bold as it is beautiful, and women of all ages are rocking the silver fox look.
But here’s the scoop from someone who’s been through it: going silver is more than just a bold choice, it’s a journey.
This hair color isn’t just about letting your natural gray show through (although it’s great for that too!); it’s about achieving that perfect, head-turning silver hue. That means understanding the coloring process thoroughly and choosing the right products to protect and enhance your hair.
So, whether you’re looking to upgrade your natural gray or dive into a new silver look, I’m here to guide you through every step. Let’s make sure you’re equipped with the best knowledge and products to get that sleek, silver shine you’re dreaming of.
As an Amazon Associate, I earn from qualifying purchases.
Table of Contents
- What’s All the Hype About Silver Hair?
- Understanding Hair Color Science
- How to dye your hair silver at home step by step.
- What you’ll need
- Best silver hair dyes at a glance.
- Step #1. Prepare your hair
- Step #2. Bleach your hair
- Step #3. Tone your hair
- Step #4. Dye your hair with silver hair dye
- Step #5. Aftercare
- Watch and learn: How to dye your hair silver at home full tutorial
- Top Tips For Dyeing Your Hair Silver At Home.
- DIY vs. Professional Dyeing
- How to care for silver hair.
- How to dye your hair silver FAQS
- Which Hair Color Suits Me?
- Parting words
- Our Research & Review Process
What’s All the Hype About Silver Hair?
Silver is top of the list of hair color trends this year.
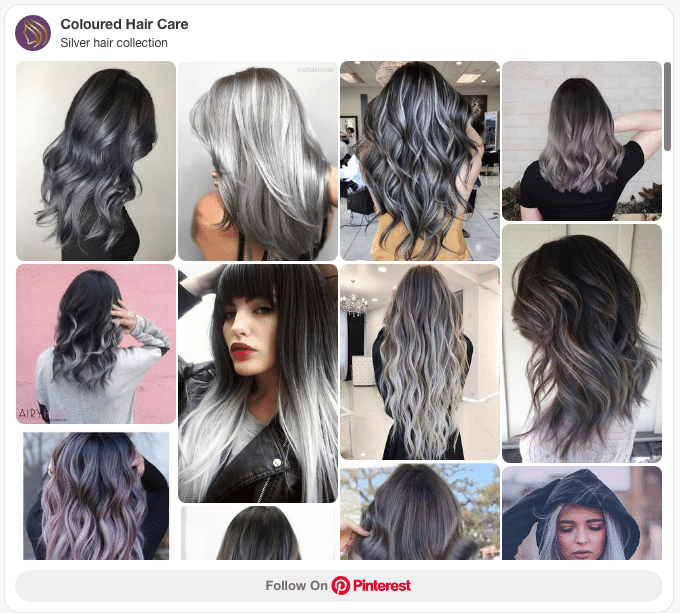
And searches over on Pinterest are bursting with every kind of silver hue you can imagine.
Silver is part of the awe-inspiring metallic hair colour trend that’s taking us all by storm.
Smokey, Dusty, Graphite, Slate, Platinum, Steel….the spectrum of silver and gray hair dye shades, tones and coloring products are endless.
From smokey greys and ice silvers to mushroom greys, silver blonde and silver rose, we love silver for its versatility, depth and dimension.
It’s a color that’s great for ombre, it’s fab for balayage and we love it as a base mixed with pastel colors like dusty pinks and purples.
It’s no wonder silver is so popular right now.
Check out the latest looks over on our Silver Hair Pinterest board for ideas and inspiration.
Understanding Hair Color Science
Ready to switch up your style with some stunning silver locks? Let’s get into a bit of hair color science to make sure your transformation goes smoothly and your new color shines brilliantly.
How Hair Color Works
Think of your natural hair color as the canvas for your silver masterpiece.
It’s all about melanin, the natural pigment that also colors your skin and eyes.
Hair has two main types of melanin: eumelanin, which gives shades of brown and black, and pheomelanin, which provides reds and yellows. Going silver means we need to lighten this natural pigment a LOT.
This is usually done with a hair bleach that strips the original color and lightens it several levels. It’s like clearing the way for your silver to really pop!
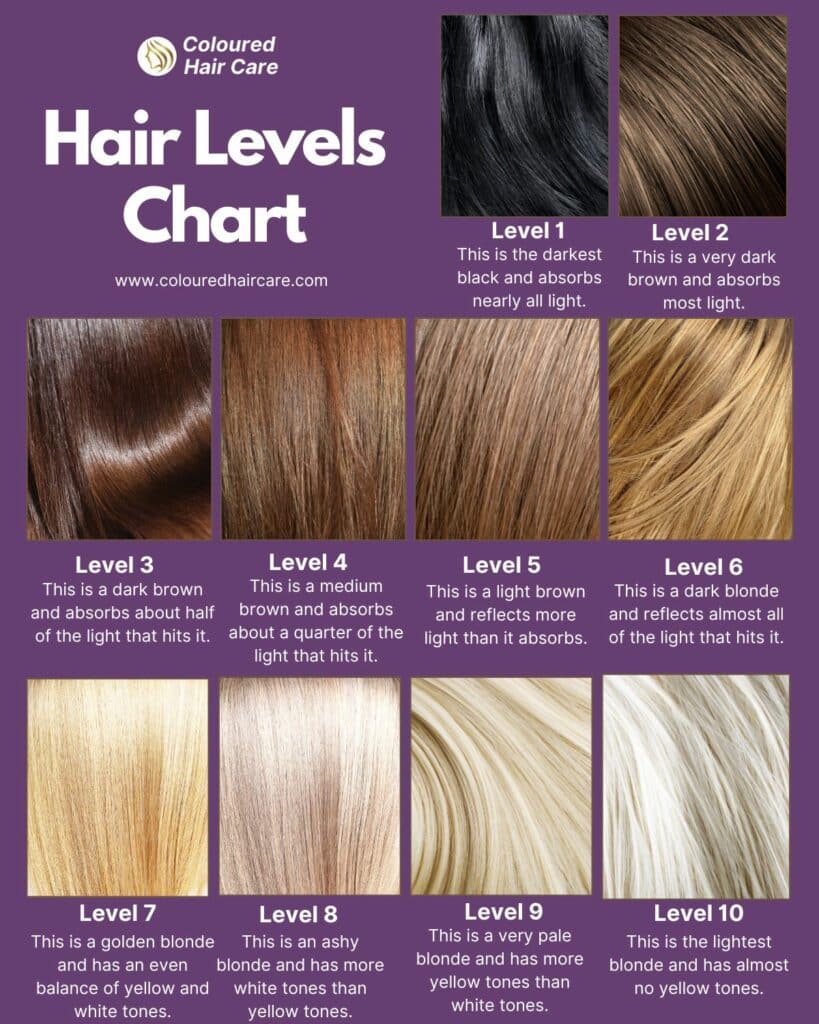
Understanding Hair Levels: The Key to Perfect Silver
Hair levels refer to the degree of lightness or darkness of your hair, with 1 being the darkest (black) and 10 being the lightest (pale blonde).
Knowing your starting level helps determine how much lightening is needed to achieve the ideal base for silver hair.
Why Hair Levels Matter:
- Level 1 to 5 (Dark to Medium Brown): These levels require more bleaching sessions to reach the lightness needed for silver dye to show true to color.
- Level 6 to 7 (Dark Blonde to Blonde): Lighter to begin with, these levels might need fewer bleach applications to achieve the pale blonde necessary for a vivid silver.
- Level 8 to 10 (Light Blonde to Pale Blonde): Already close to the required base color, these hair levels can usually be dyed silver with minimal pre-lightening.
Pro Tip: Always use a toner after bleaching to neutralize any brassy tones and create a clean, even base for your silver dye.
Understanding your hair’s level not only helps in planning the dyeing process but also in avoiding excessive damage caused by unnecessary bleaching.
Expert Insights
“Silver is a very difficult color to achieve as the hair needs to be bleached as light as possible. Any yellow left in the hair will result in green hues as silver is blue based, so this means you still aren’t light enough for silver or you need to be toned first.”
Kristen Bee, Hair Stylist for 20 years and counting
What Happens When You Go Silver?
Silver isn’t just another color; it’s a statement.
Since it’s typically a semi-permanent or temporary dye, it sits on top of your hair rather than deeply penetrating it.
This means it will fade gracefully over time but needs a very light, almost platinum base to truly shine. If the bleaching step isn’t done right, the silver might not show as vividly as you hope, turning more dull than dazzling.
How Your Hair Type and Color Affect Your Silver
Your hair’s texture and natural color aren’t just details—they’re big players in how your dye job will turn out.
Coarser, thicker hair? It’s a bit stubborn, protecting itself with more cuticles and might need more persuasion (a.k.a. more time with bleach) to accept the new color.
Lighter hair, like blondes, often have a smoother time going silver, needing less bleach to reach the perfect shade.
Darker hair types, on the other hand, will need to be patient, as achieving that perfect light base for silver can be a quite a process.
Always remember, rushing can lead to damage, and we want your silver to look not only stunning but also healthy!
Expert Insights
“A professional can assess the porosity of your hair—that’s how well your hair absorbs and holds moisture, which drastically affects how it takes up color.”
Enza Piazza, Hair Stylist & Color Consultant
How to dye your hair silver at home step by step.
You don’t have to spend a fortune at the salon to get perfect silver hair.
But you’ve got to be ready to put the work in to get it right at home! Follow our easy guide to dye your hair silver like a pro.
Expert Insights
“If you’re dyeing at home, never skip the strand test—it’s your best defense against unexpected results.”
Enza Piazza, Hair Stylist & Color Consultant
What you’ll need
- Clarifying shampoo to remove dirt, debris and styling products from your hair.
- A hair dye kit that will give you all the tools you need to apply it like a pro.
- A hairdressers cape to protect your clothes. Towels will get stained and keep falling off.
- A barrier cream to prevent the colour getting on your skin. (Vaseline will do!)
- A wide toothed comb to separate your hair and comb through the dye.
- A colour-safe shampoo and conditioner.
- A well-ventilated room!
And your silver hair dye of choice. These are our top picks below. You can read more about each one in our Best silver hair dye reviews.
Best silver hair dyes at a glance.
| Hair dye | Looks like | Best for | Buy now |
|---|---|---|---|
| Garnier Olia Silver Hair Dye Permanent | Rich dark silver with purple hues | ||
| Schwarzkopf LIVE Intense Colour Urban Metallics, Dusty Silver | Dusty grey tones | ||
| Revlon ColorSilk Beautiful Color Permanent Hair Color, Silver Blonde | A great base for adding colors | ||
| Schwarzkopf Ultra Bright Silver Steel. | A subtle silver sheen | ||
| L’Oreal Paris Feria Multi-Faceted Shimmering Permanent Hair Color, Smokey Silver | Smokey silver color | ||
| Knight & Wilson Colour Freedom Metallic Glory Silver Blonde Permanent Hair Colour | Silver Blonde cool color |


Step #1. Prepare your hair
Before you start dyeing your hair silver, you need to prepare it properly for going through the harsh bleaching and dyeing process.
A few days before you plan to dye it, and in the week leading up to it, deep-condition your hair to make sure it’s strong and healthy.
Another thing to keep in mind is to never bleach your hair if it’s wet, oily, or dirty. This will cause uneven and patchy results.
This means washing it with a clarifying shampoo to get rid of any buildup and residue.
Wait until your hair is completely dry and clean before you start the process.
Step #2. Bleach your hair
Bleaching your hair is a must if you want a true silver hue.
You need to lighten your hair to a pale, almost-white shade base before applying the silver dye on top.
Bleaching can be harsh on your hair, so make sure you use a good quality bleach that’s safe and designed to use at home use and to follow the instructions carefully.
You should also use a protective barrier cream around your hairline and ears to avoid staining your skin.
You’ll need a different volume of developer and bleach depending on how many hair levels you need your color to lift.
Leave the bleach in for the recommended amount of time depending on the amount of lift needed. Keep an eye on it as it processes.
If you have a dark hair color like dark brunette or black, you may need to bleach your hair more than once. This is only recommended if your hair is strong enough to take it!
If in doubt, see a professional colorist at your local salon who can help you out.
Step #3. Tone your hair
Once you’ve bleached your hair, you’ll probably notice some warm yellow or brassy tones in it.
This is totally normal! It means it’s time to tone your hair color.
You should use a toner that’s specifically made for gray or silver hair to get the perfect shade.
Apply the toner evenly to your hair, making sure to saturate every strand. Leave it on for the recommended time, and then rinse it off with cold water.
If your hair feels particularly dry or damaged at this stage – if it feels sticky when it’s wet, then it’s super damaged – then give your hair a week to recover before dyeing it silver.
Step #4. Dye your hair with silver hair dye
Now, the fun part begins. It’s time to dye your hair silver!
Make sure to choose a quality silver hair dye that’s designed to use at home. You’ll have everything you need to dye your hair in the kit.
Apply the dye to your hair, starting from the roots and working your way down to the ends.
Make sure to evenly saturate your hair with the dye, and then leave it on for the recommended time.
Rinse your hair with cool water until the water runs clear, and then apply a conditioner to keep your hair moisturized. Voila! You have silver hair!
Step #5. Aftercare
Your silver hair journey doesn’t just end with luscious silver locks.
It’s important to take good care of it to maintain the color and keep it healthy.
This means using a color-safe shampoo and conditioner, avoiding hot styling tools, wearing a hat in the sun, and getting regular trims to prevent split ends.
You should also use a hair mask once a week to keep your hair hydrated and nourished.
Watch and learn: How to dye your hair silver at home full tutorial
Here’s a great video tutorial from hair dye masters The Beauty Studio that guides you through how to bleach and dye your hair from brown to silver at home step by step!
Top Tips For Dyeing Your Hair Silver At Home.
1.Pre-Lightening Is Key
This color won’t show up on darker hair. The lighter the hair, the brighter the silver will appear. You can pre-lighten your hair using bleach or a high-lift color like a blonde shade.
2. Conditioning Is Critical
Use a deep conditioner a week before your appointment and continue to use it regularly to nourish your hair. This will not only protect your hair from damage but also help the color last longer.
3. Choose the Right Silver Dye
Look for products specifically designed for silver hair or those with a purple undertone. These dyes will help to neutralize any yellow tones that might appear after pre-lightening, delivering a perfect silver hue.
4. Time It Right
Dyeing your hair silver takes time, effort, and patience. Plan ahead and give yourself ample time, at least four hours, to complete the process.
5. Don’t Overwash
After dyeing your hair silver, don’t overwash it. The color fades quickly if it’s exposed to too much water.
6. Protect Your Silver Hair
Once you’ve achieved the perfect silver shade, you need to take care of it to keep it fresh.
7. Keep Your Roots in Check
The silver dye only lasts so long before your natural hair color starts to grow out. When this happens, you’ll need your roots touched up!
DIY vs. Professional Dyeing
Choosing between dyeing your hair at home or heading to a salon is a big decision, especially when you’re aiming for something as ambitious as silver.
Both options have their perks and pitfalls, and I’ve experienced both firsthand. Let’s break down the pros and cons to help you decide what’s best for your silver ambitions.
DIY Dyeing:
Pros
DIY Dyeing
- Cost-Effective: Doing it yourself is undeniably cheaper than a salon visit. You only need to buy the dye and other essentials.
- Convenience: You can dye your hair on your own schedule, in the comfort of your home.
- Fun and Fulfilling: There’s a certain satisfaction in achieving a great result by yourself. It’s a fun project, especially if you love experimenting with your look.
Cons
DIY Dyeing
- Risk of Mistakes: Without professional skills, you might face issues like uneven application, choosing the wrong products, or even damaging your hair.
- Limited Techniques: Some dyeing techniques, like balayage or ombre, are hard to pull off on your own.
- Maintenance Challenges: Keeping the color vibrant and your hair healthy without professional products and advice can be more challenging.
Professional Dyeing:
Pros
Professional Dyeing
- Expertise and Experience: Hair stylists have the training to handle your hair type, choose the right products, and fix any issues that arise during the process.
- Professional Products: Salons have access to high-quality dyes and toners that might not be available in stores, leading to better results.
- Less Stress: Letting a professional handle the process can be a lot less stressful. You can relax, knowing your hair is in good hands.
Cons
Professional Dyeing
- Higher Cost: Professional dye jobs can be expensive, especially if you’re going for a high-maintenance color like silver.
- Time-Consuming: A salon visit can take several hours, and you might need multiple sessions to achieve the perfect shade.
When to Consider Seeing a Hair Color Specialist:
- You Have Dark or Resistant Hair: If your natural color is dark or your hair doesn’t bleach easily, a professional can manage the bleaching process more safely and effectively.
- You Want a Specific Shade or Technique: For specific shades of silver or techniques like highlights, a professional’s skill can ensure you get the precise look you want.
- Your Hair is Already Compromised: If your hair is damaged or over-processed, a professional can assess the best way to achieve your color goals without further harm.
Expert Insights
“The maintenance & upkeep is as being a platinum blonde. And you cannot wash it as often because it fades very quickly.”
Jennifer Adams, Licensed Cosmetologist specializing in color
How to care for silver hair.
Silver hair can be absolutely stunning, but it does require a bit of TLC to maintain its shimmer and shine.
Make sure to use a shampoo and conditioner specifically designed for silver hair to keep it from looking dull or yellow.
Also, avoid using hot tools like straighteners and curling irons too often, as they can damage hair and cause split ends.
You can also use a purple toning mask once a week to brighten and refresh your color.
Lastly, be sure to protect your silver strands from the sun and pool chemicals by wearing a hat and using a swim cap!
Following these steps can help your silver hair look its best for longer.
How to dye your hair silver FAQS
What color does your hair have to be to dye it silver?
Whether you’re a natural blonde, have brunette hair, or are a redhead, you can dye your locks silver as long as they’re light enough to begin with.
Keep in mind that the lighter your hair is, the easier it will be to achieve a true silver shade without damaging your tresses.
If you’re starting from a darker base, you may need to bleach your hair first to get the desired result. Go carefully – no one wants frizzy hair of any color!
How light do you have to bleach your hair to dye it silver?
The answer is pretty light!
In order for the silver dye to properly take hold, your hair needs to be a pale, almost platinum blonde.
This means that you’ll need to bleach your hair several times to achieve this level of lightness.
If you’re worried about bleaching your hair so much, try on-trend gray hair dye for a more muted silver look.
Do I need to tone my hair before dying it silver?
Toning your hair before dying it silver will help achieve that shimmery, metallic look we all know and love.
It can also help neutralize any unwanted undertones in your hair, preventing it from looking yellow or brassy.
Plus, toning products can add some serious shine and softness to your hair, leaving it looking and feeling healthier than ever.
So, bottom line: if you want to get the most out of your silver hair dye, toning is definitely the way to go.
Will silver hair suit me?
Unlike the warm metallic tones of copper and gold, silver is definitely for cool types.
So if you have fair hair, eyes and complexion, you’ll look gorgeous with silver hair.
That’s not to say warmer tones can’t pull it off.
Darker greys with warmth like mushroom or adding a pastel wash over the top could work for you.
Find out your undertones with our handy checklist!

If you’re not sure what your natural colouring is, take our quiz!
Just answer a few quick questions to find out which hair colours suit you!
Which Hair Color Suits Me?
You can also try on some virtual hair colors with the Best hair color changing apps you need to use this year!
Can I just let my dyed hair go gray?
If you’re thinking of saving time and effort and hard earned cash by growing out your natural hair to gray, think again.
Natural grey hair isn’t the gorgeous silver shiny colour we’re all lusting after.
Typically grey hair is coarse and has hints of yellow tones.
Though you can keep brassiness in check with a good purple shampoo or silver shampoo.
Here, you have two options:
- Letting your roots grow out is of course doable but it will take almost forever and look horrendous quite frankly.
- See a professional. They’ll blend silver highlights or gray highlights into your hair to help it grow out but this is a super intense process that’ll take a few salon trips (and a lot of dosh) and they’ll recommend that you cut your hair short to save it from complete decimation.
Growing grey gracefully is not an easy process but the good thing is, it’s temporary.
Within a year to 18 months, you’ll end up with the hassle-free silver grey color that will make your life easier in the long run.
How long does it take to dye hair silver?
There’s no one-size-fits-all answer to how long it will take, because it depends on a few factors.
First up is the color you’re starting with. If you’re already light blonde, you’ll have a much easier time getting to silver than if you’re starting with dark brown hair or black locks.
Are you used to dyeing or bleaching your hair yourself at home? You’ll probably get it done quicker – this isn’t really a good color to tackle for beginners!
Finally, the length of your hair will obviously play a role.
In our expert opinion having done the process a few times with other colors, you can expect it to take anywhere from a couple of hours to half a day.
But hey, good things come to those who wait – and trust us, silver hair is definitely worth the wait!
Why is silver hair hard to dye?
Silver hair is notoriously difficult to dye and there are a couple of reasons why.
First, achieving that perfect silver color often requires bleaching your hair to a nearly-white shade.
This means your hair cuticles are extremely open and can have a difficult time retaining color.
Second, silver hair tends to be more coarse and wiry than other shades, making it harder for dye to penetrate evenly.
But with the right preparation and techniques, it is possible to achieve that gorgeous silver hue you’ve been dreaming of.
How long does silver hair last?
If you take good care of your silver locks, and stay on top of your maintenance routine, you can expect your silver hair to last around six to eight weeks before you need to touch it up again.
But the real secret to keeping your silver strands vibrant and shiny is to invest in a high-quality toning shampoo that will keep brassy yellow tones at bay and your color looking cool.
Parting words
So there you have it – silver hair is the trend of the season and it’s achievable, right at home!
Whether you want to achieve a gradient grey or a bold full coverage shade, we’ve detailed all of the steps you need to take in order to pull off the perfect dye job.
Before you dive in, it’s always important to understand your natural hair color and condition before changing it.
Do some research on what shade of silver and which haircuts will be best for you and ensure to use quality products – that way your new look can last as long as possible!
We hope this post has provided helpful tips on how to dye your hair silver at home.
Found your perfect shade? We’d love to see it! Tag us on Instagram @colouredhaircare or Facebook and share your hair dye success stories. Looking for more hair care tips? Check out How to Look After Colored Hair: 11 Expert Secrets For Long-Lasting Color.
Our Research & Review Process
To ensure our recommendations are as comprehensive and reliable as possible, we’ve undertaken an extensive research effort.
We cite scientific evidence and journals, collect real user reviews and gather impartial perspectives from hair stylists, users, and experts in the field.
Additionally, we conduct hands-on testing by using products and applying hair dyes not only on our own locks but also on real human hair extensions and hair pieces of different hair type, textures and lengths.
This rigorous approach allows us to provide you with insights into which products genuinely live up to their promises.
As always – please consult with a professional hair colorist or stylist for advice on how to color your own hair at home. It’s different for everyone!
