
If, like us, you’re a fan of changing up your hair color, there comes a time in all of our rainbow-colored lives when we think about bleaching our hair.
The thought of doing this yourself may well send shivers down your spine! But the truth is, with a little guidance, it’s easy! That’s why we’re here to tell you exactly how to bleach hair at home in a way that’s safe for your hair, and you!
Bleaching is one of the best ways to get an extreme hair color change but you need to make sure that your hair remains healthy and strong.
Everything from ice-blonde to platinum silver can be achieved with the right bleaching technique and products. Here’s a guide to help you get started!
As an Amazon Associate, I earn on qualifying purchases.
Table of Contents
- How to bleach hair at home step by step.
- Watch and learn: How to bleach hair at home.
- What is hair bleach?
- Best hair bleach kits at a glance.
- Do I need to bleach my hair?
- Can I bleach my hair at home?
- How long will it take to bleach my own hair?
- Top Tips for Bleaching Your Hair at Home.
- Will bleach damage my hair?
- Can I bleach my hair naturally?
- How can I take care of my hair after bleaching?
- Parting words
How to bleach hair at home step by step.
Bleaching is a magical process that can unlock a whole spectrum of colors and styles.
But here’s the thing: bleach, while fabulous, is also pretty potent and can be damaging to your precious locks. That’s why prepping your hair correctly is ESSENTIAL to avoid frizz and dry, broken hair.
Here’s how to prepare your hair for its upcoming lightening session.
- Pamper Your Hair: Before the bleach comes anywhere near your hair, give it some extra love. Indulge in deep conditioning treatments a couple of weeks prior to strengthen and fortify your strands.
- Hold Off on Washing: A day or two of natural oils can act as a protective barrier against the bleach. So, it’s totally okay (and even recommended) to skip the shampoo a couple of days before D-Day.
- Stay Natural: Avoid other chemical treatments like coloring, perming, or straightening at least a month before bleaching.
- Patch Test: Always, always do a strand test before full application. This will give you an idea of how your hair reacts to the bleach and the kind of results you can expect.
Step 1: Assemble the tools.
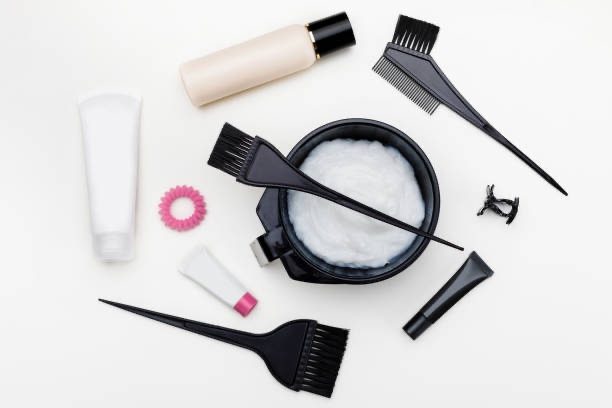
You will need:
- Tint brush
- Hair lightener/bleach hair kit (see below!)
- Plastic gloves
- Mixing bowl
- Conditioning after-treatment
- Full instructions
You’ll also need:
- An old towel to protect your clothes and surfaces
- Vaseline to apply to your ears and hairline to stop the bleach getting on your skin
- Some hair clips to hold back sections of your hair to apply the lotion more precisely.
And don’t forget to do a strand test before you start!
Step 2: Mixing the Bleach
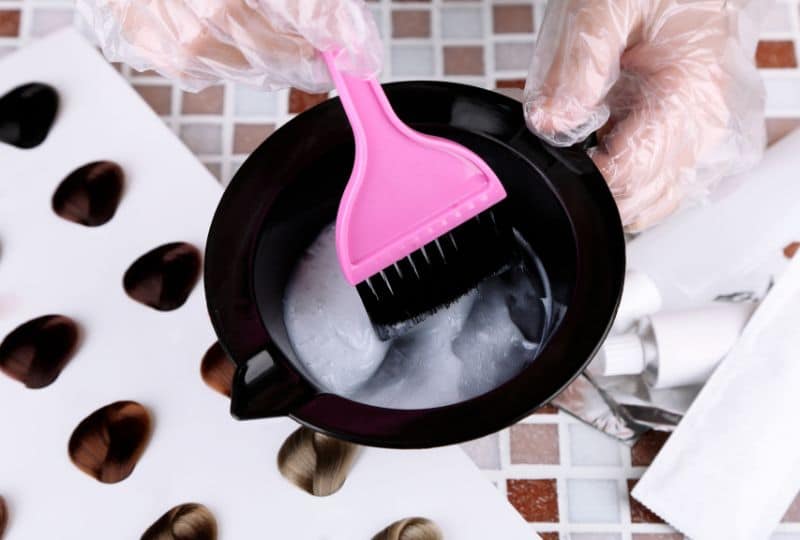
Once you have all your tools gathered, it’s time to mix the bleach according to the instructions on the package.
Most kits will require you to mix the bleach powder with developer cream in a non-metal bowl. Be sure to follow the directions carefully!
Once the bleach mixture is ready, it’s time to apply it to your hair. You can apply bleach to wet hair or dry hair but we recommend dry hair for the best results.
If your hair is particularly damaged, wet hair will give you some protection against the bleach.
Step 3: Applying the Bleach
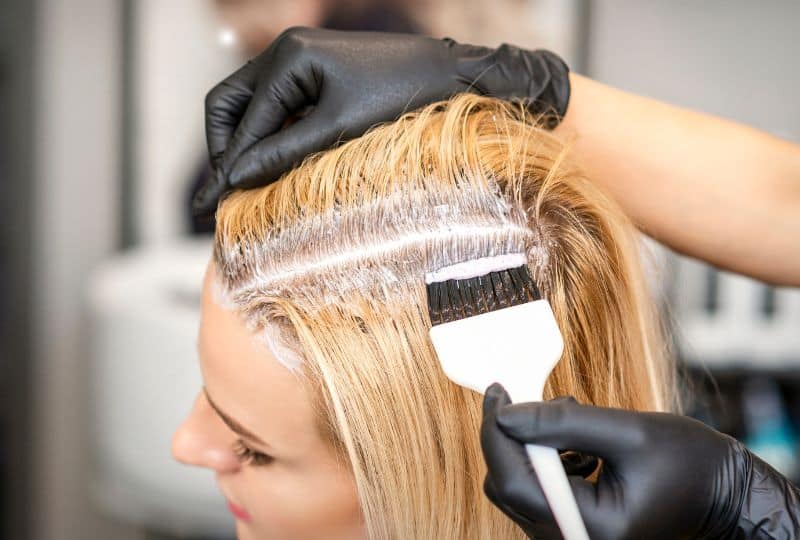
It’s time to get started! First, put on your gloves and old clothes. Then, drape the old towel over your shoulders to protect your clothing from any potential stains.
Start by sectioning off your hair to make it easier to apply the formula. You
Start at the roots and work your way down to the ends. Be sure to thoroughly saturate each section of hair; otherwise, you’ll end up with uneven results.
Step 4: Development time
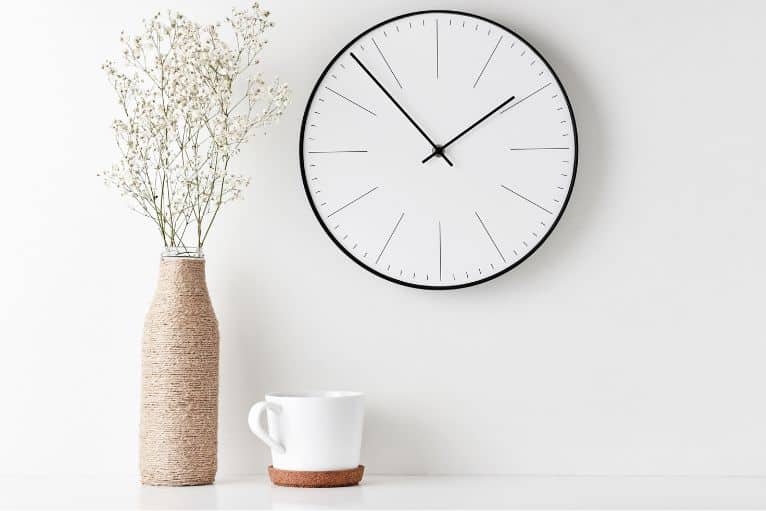
Once you’ve applied the bleach evenly throughout your hair, put on a shower cap and wait for the right amount of time before rinsing out.
As a general guide to how long you should leave bleach in your hair, you shouldn’t leave it in for more than 30 minutes.
But this does depend on the condition of your hair, the base color to begin with and whether your hair has been dyed before.
Step 5: Rinse and tone.
After 30 minutes have passed, rinse out the bleach until the water runs clear.
Bleached hair typically leaves some warmer tones of red or orange, so you may want to use a toner at this stage to get rid of any unwanted brassiness.
You can skip this step if you’re planning to dye your hair another color! If your hair is in good condition, just grab your chosen box of hair dye and follow the instructions.
Then shampoo and condition your hair as usual, and style it however you like!
If your hair isn’t light enough, you can repeat the bleaching process (Steps 3 and 4) but we’d recommend leaving it at least 48 hours in between bleaching to give your hair time to recover.

Watch and learn: How to bleach hair at home.
Here’s a fantastic video that shows you how to bleach your hair at home, step-by-step so you can follow along and bleach your hair like the professionals.
What is hair bleach?
Hair bleach is not what you clean the toilets with!
It’s a powerful hair coloring product that lightens the color of your hair.
It works by lifting your hair cuticle and breaking down the pigments in your hair, making them lighter in color by a shade or two. Hair bleach can be used to achieve a variety of looks, from highlights to an all-over lightened platinum color.
Bleaching your hair is a commitment, as it can take multiple sessions to achieve your desired look and can damage your hair if not done properly.
However, when done right, bleaching your hair can be a fun way to experiment with your look.
Hydrogen peroxide is the most common bleaching agent used to lift and lighten hair color. It penetrates your hair shaft to strip it of color in a permanent process.
Like all bleach, it’s toxic so you need to be careful when handling it. And yes, it damages your hair so you need to look after it before, during and after.
You can read more about the best bleach kits for your hair in our hair bleach kit reviews.
Best hair bleach kits at a glance.
| Bleach kit. | Looks like | Best for | Buy it now |
|---|---|---|---|
| Garnier Nutrisse Bleach Hair Dye. | Going platinum blonde. | ||
| Schwarzkopf Live Intense Lightener | Subtle colour lift. | ||
| L'Oreal Colorista Effects Bleach Lightening Kit | Extra lightening fast results. | ||
| Schwarzkopf Professional BlondMe Premium Brightener. | Going a few shades lighter than your base. | ||
| Garnier Olia Permanent Bleach Super Blondes Extreme | Lifting darker shades. |


")
")
Do I need to bleach my hair?
Bleaching your is a lightening process that can strip out color from your hair and provide a great base for a new one. Whether you should bleach your hair depends on what you want to achieve.
If you want to dye your hair a lighter color than it is – like if you want to go from light brown to blonde hair – you need to bleach or lighten your hair. Color can’t lighten color so you need to remove all of it before you dye it the color of your dreams.
If you want to go blonde or blonder, you might need to do more than one DIY bleaching process to get the lighter color you’re after. More bleaching means more damage so space out these sessions to give your hair time to recover in between.
If you’re worried about using bleach, you can try lightening your hair naturally. Or speak to a professional colorist who will give you the best advice for your own hair.
Highlights, balayage, and ombre are bang on-trend styles lend themselves to having parts of your hair bleached too.
Can I bleach my hair at home?
Bleaching your hair at home is not as simple as other processes. The results are pretty dramatic and irreversible so you need to go slow and steady.
Dark hair in particular can be tough to lighten with bleach. But with the right bleaching kit and advice under your hat, it’s totally doable.
How long will it take to bleach my own hair?
Set aside around 1-1.5 hours to DIY the bleaching process from start from to finish.
As we said earlier, you need to go slow and steady to get it right and you don’t want to rush it and end up with patches.
Top Tips for Bleaching Your Hair at Home.
Do a patch test. Before you start bleaching your hair, it’s important to do a patch test first. This will help you determine if you’re allergic to the bleach and/or the developer.
Simply mix together a small amount of bleach and developer, apply it to a small section of skin on your inner arm, and wait 48 hours to see if any irritation develops.
Read the instructions. We know that bleach kit instructions can be long and confusing, but trust us—it’s worth taking the time to read them before you start the bleaching process.
That way, you’ll know exactly how much bleach and developer to mix together, how long to leave the bleach mixture in your hair, and what kind of aftercare is required.
Invest in some good quality products. When it comes to bleach, you get what you pay for. That’s why we recommend investing in some good quality products—bleach kits from reputable brands tend to work better and cause less damage than cheaper alternatives.
Don’t skip the aftercare steps. Once you’ve removed the bleach from your hair, it’s important to follow the aftercare steps specified in the instructions (usually this involves shampooing and conditioning with products designed for bleached hair).
By following these top bleaching tips, you’ll help keep your locks healthy and hydrated.
Will bleach damage my hair?
Of course, bleach is bad for your hair as the processing dries it out and can turn it into a frizz factory.
So you need to prepare it for harsh treatment by giving it some love in the run-up to bleaching day.
Take a look at the health of your hair too. If it is dull and lifeless and lacking in lustre, bleaching your hair might not be right for you at this moment.
It also makes a difference if you have virgin hair (hair that has never been dyed) or dyed hair too. Dark hair is also hard to bleach so it might need a couple of bleaching processes.
If your bleached hair doesn’t hold color because it’s too porous, you can have a chat with your hairdresser about your options.
You can also try a hair bleach bath which is a gentler way to bleach your hair, but it’s not as strong so you may not get the lift you desire.
The main thing is to be careful you don’t damage your scalp if you have sensitive skin.
Can I bleach my hair naturally?
For those looking for a more natural approach to bleaching their hair, you’re in luck!
While bleach is an effective way to lighten hair color, it can also be damaging to your locks. Here’s how to go natural when you bleach your hair at home:
Lemon Juice and Sunlight
One of the most common methods of “bleaching” your hair naturally is by using lemon juice and sunlight. This method works best with lighter shades of hair because the lightening effect will be more noticeable.
The acidity in the lemon juice helps break down the melanin in your hair which leads to a lighter color.
To get started, simply mix freshly squeezed lemon juice with water (roughly 1/3 cup to 2/3 cup) and apply it over dampened strands. Sit in the sun for about 30 minutes or until your desired tone is reached and then rinse out the mixture.
Repeat this process as often as necessary to achieve your desired look!
Honey and Vinegar Rinse
Got dark blonde hair? Honey and vinegar are both known for their ability to brighten blonde strands without causing any damage whatsoever!
To use this method, mix equal parts honey and apple cider vinegar together before applying it onto dampened strands.
After applying the mixture, sit in direct sunlight or under a hooded dryer until your desired tone is achieved (about 20 minutes).
Once done, rinse out with cold water and shampoo/condition as usual!
Chamomile Tea Rinse
If you’re looking for a gentle solution that won’t strip away too much color from your locks, chamomile tea could be just what you need!
Brew up some chamomile tea (1-2 cups should do) before pouring it into a spray bottle and spritzing all over dampened strands.
Leave it on for about 15 minutes before rinsing out with lukewarm water followed by shampoo/conditioner as usual.
The natural lightening properties of chamomile tea will help add subtle highlights without making drastic changes to your current shade!
If you have dark brown hair or black hair, don’t expect these natural methods to lift your hair coloring too much. If you want to lift more than one level, it’s hair lightener or bleach for you!
How can I take care of my hair after bleaching?
After you’ve stripped your color and achieved a fabulous blonde look you love, you’ll want to deep condition your hair regularly and avoid a lot of heat styling if you can.
Your hair will be fragile and more prone to breakage, split ends and flyaways for a couple of weeks. Use a shampoo and conditioner for bleached hair that will help to replenish and restore your hair shafts and make your bleached hair feel soft and silky.
Use a hair mask or deep conditioner once a week to replace lost moisture and nourish your hair.
Go easy on using hot tools like a blow dryer, curling tongs and flat irons. When you do heat style, use a heat protectant every time.
Hair toners and hair glosses will keep your color cool and bright and get rid of any unwanted brassiness and brassy tones. You can use them as soon as your hair is bleached to banish orange and yellow tones.
You’ll also need to use specially formulated silver and purple shampoos and conditioners to keep the color in tip top condition.
Parting words
Bleaching your hair at home can save you time and money—but only if you do it right!
By following our top bleaching tips, you’ll be well on your way to achieving salon-worthy results without having to step foot outside your door.
